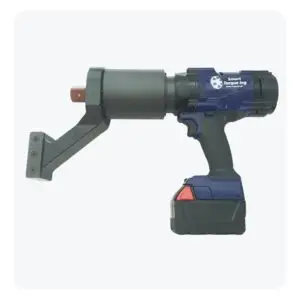
For professionals relying on Heavy Duty Cordless Torque Wrenches—especially those operating in critical fields like Wind Energy or Mining—precision is paramount. Applying incorrect torque can lead to catastrophic structural failure, costly downtime, and severe safety risks. This is why regular calibration is not just a best practice; it’s a regulatory requirement.
Calibration is the process of comparing your wrench’s output against a known, traceable standard. For the North American market, this standard is typically based on NIST (National Institute of Standards and Technology) guidelines. A properly calibrated wrench provides NIST Traceability, ensuring that the2000Nm / $1500ft-lbs you set is the torque you actually deliver.
Calibration Results Chart
| Point | Target Torque (ft-lbs) | Pre-Calibration Reading (ft-lbs) | Post-Calibration Reading (ft-lbs) |
| 1 | 500 | 518 | 501 |
| 2 | 1000 | 1045 | 1003 |
| 3 | 1500 | 1572 | 1502 |
| Tolerance | N/A | 4% | In Spec 4% or better |
Description for the Graph: The chart above demonstrates how pre-calibration drift can cause significant over-torquing. After the calibration procedure, the wrench’s readings are verified to fall within the strict industry tolerance range, providing confidence in its Digital Accuracy.
Our advanced Digital Battery Torque Wrenches are designed for precision, but constant use, high-load cycles, and exposure to environmental factors can cause minute deviations. The process typically involves three key steps:
Inspection and Testing: The wrench is visually inspected and connected to a high-capacity Torque Transducer (a certified device that measures actual force). Multiple tightening tests are performed across the full range to determine the current accuracy.
Adjustment and Correction: If the tool’s readings fall outside the allowable tolerance usually 4%-5%
, internal software adjustments are made to correct the output signal, ensuring the Digital Display matches the force delivered.
Certification and Documentation: A final series of verification tests is run. Upon passing, a formal Calibration Certificate is issued, which is essential for audit and compliance purposes.
Suggested Visual 2: Calibration Frequency Table
| Application Type | Usage Frequency | Recommended Calibration Interval | Key Risk Factor |
| Critical Bolting | Daily / High Cycle | Every 6 Months or 5,000 Cycles | Structural Failure / Liability |
| Standard Industrial | Weekly / Moderate | Every 12 Months | Tool Drift / Inefficiency |
| Infrequent Use | Monthly / Low | Every 12 Months | Environmental Factors (Temp/Humidity) |
| Post-Repair | N/A | Immediately | Component Replacement |
Conclusion on Frequency: While the standard is often annually, severe users in Heavy Duty applications should always follow a semi-annual schedule (6 months) to maintain the high-accuracy required when dealing with massive fasteners.
When it’s time to service your Industrial Cordless Nut Runner, choosing a certified calibration lab is crucial. They must use equipment traceable back to national standards (NIST) and be specifically rated to handle the high torque capacity of your tool 1500 ft-lbs and up This step guarantees that your investment continues to deliver the power and precision necessary for safety and compliance.
Don’t wait for drift—protect your assets and your team by prioritizing scheduled calibration.

Why High Torque Cordless Wrenches are Replacing Hydraulic Tools The

For decades, the realm of high-torque bolting—the tightening of critical